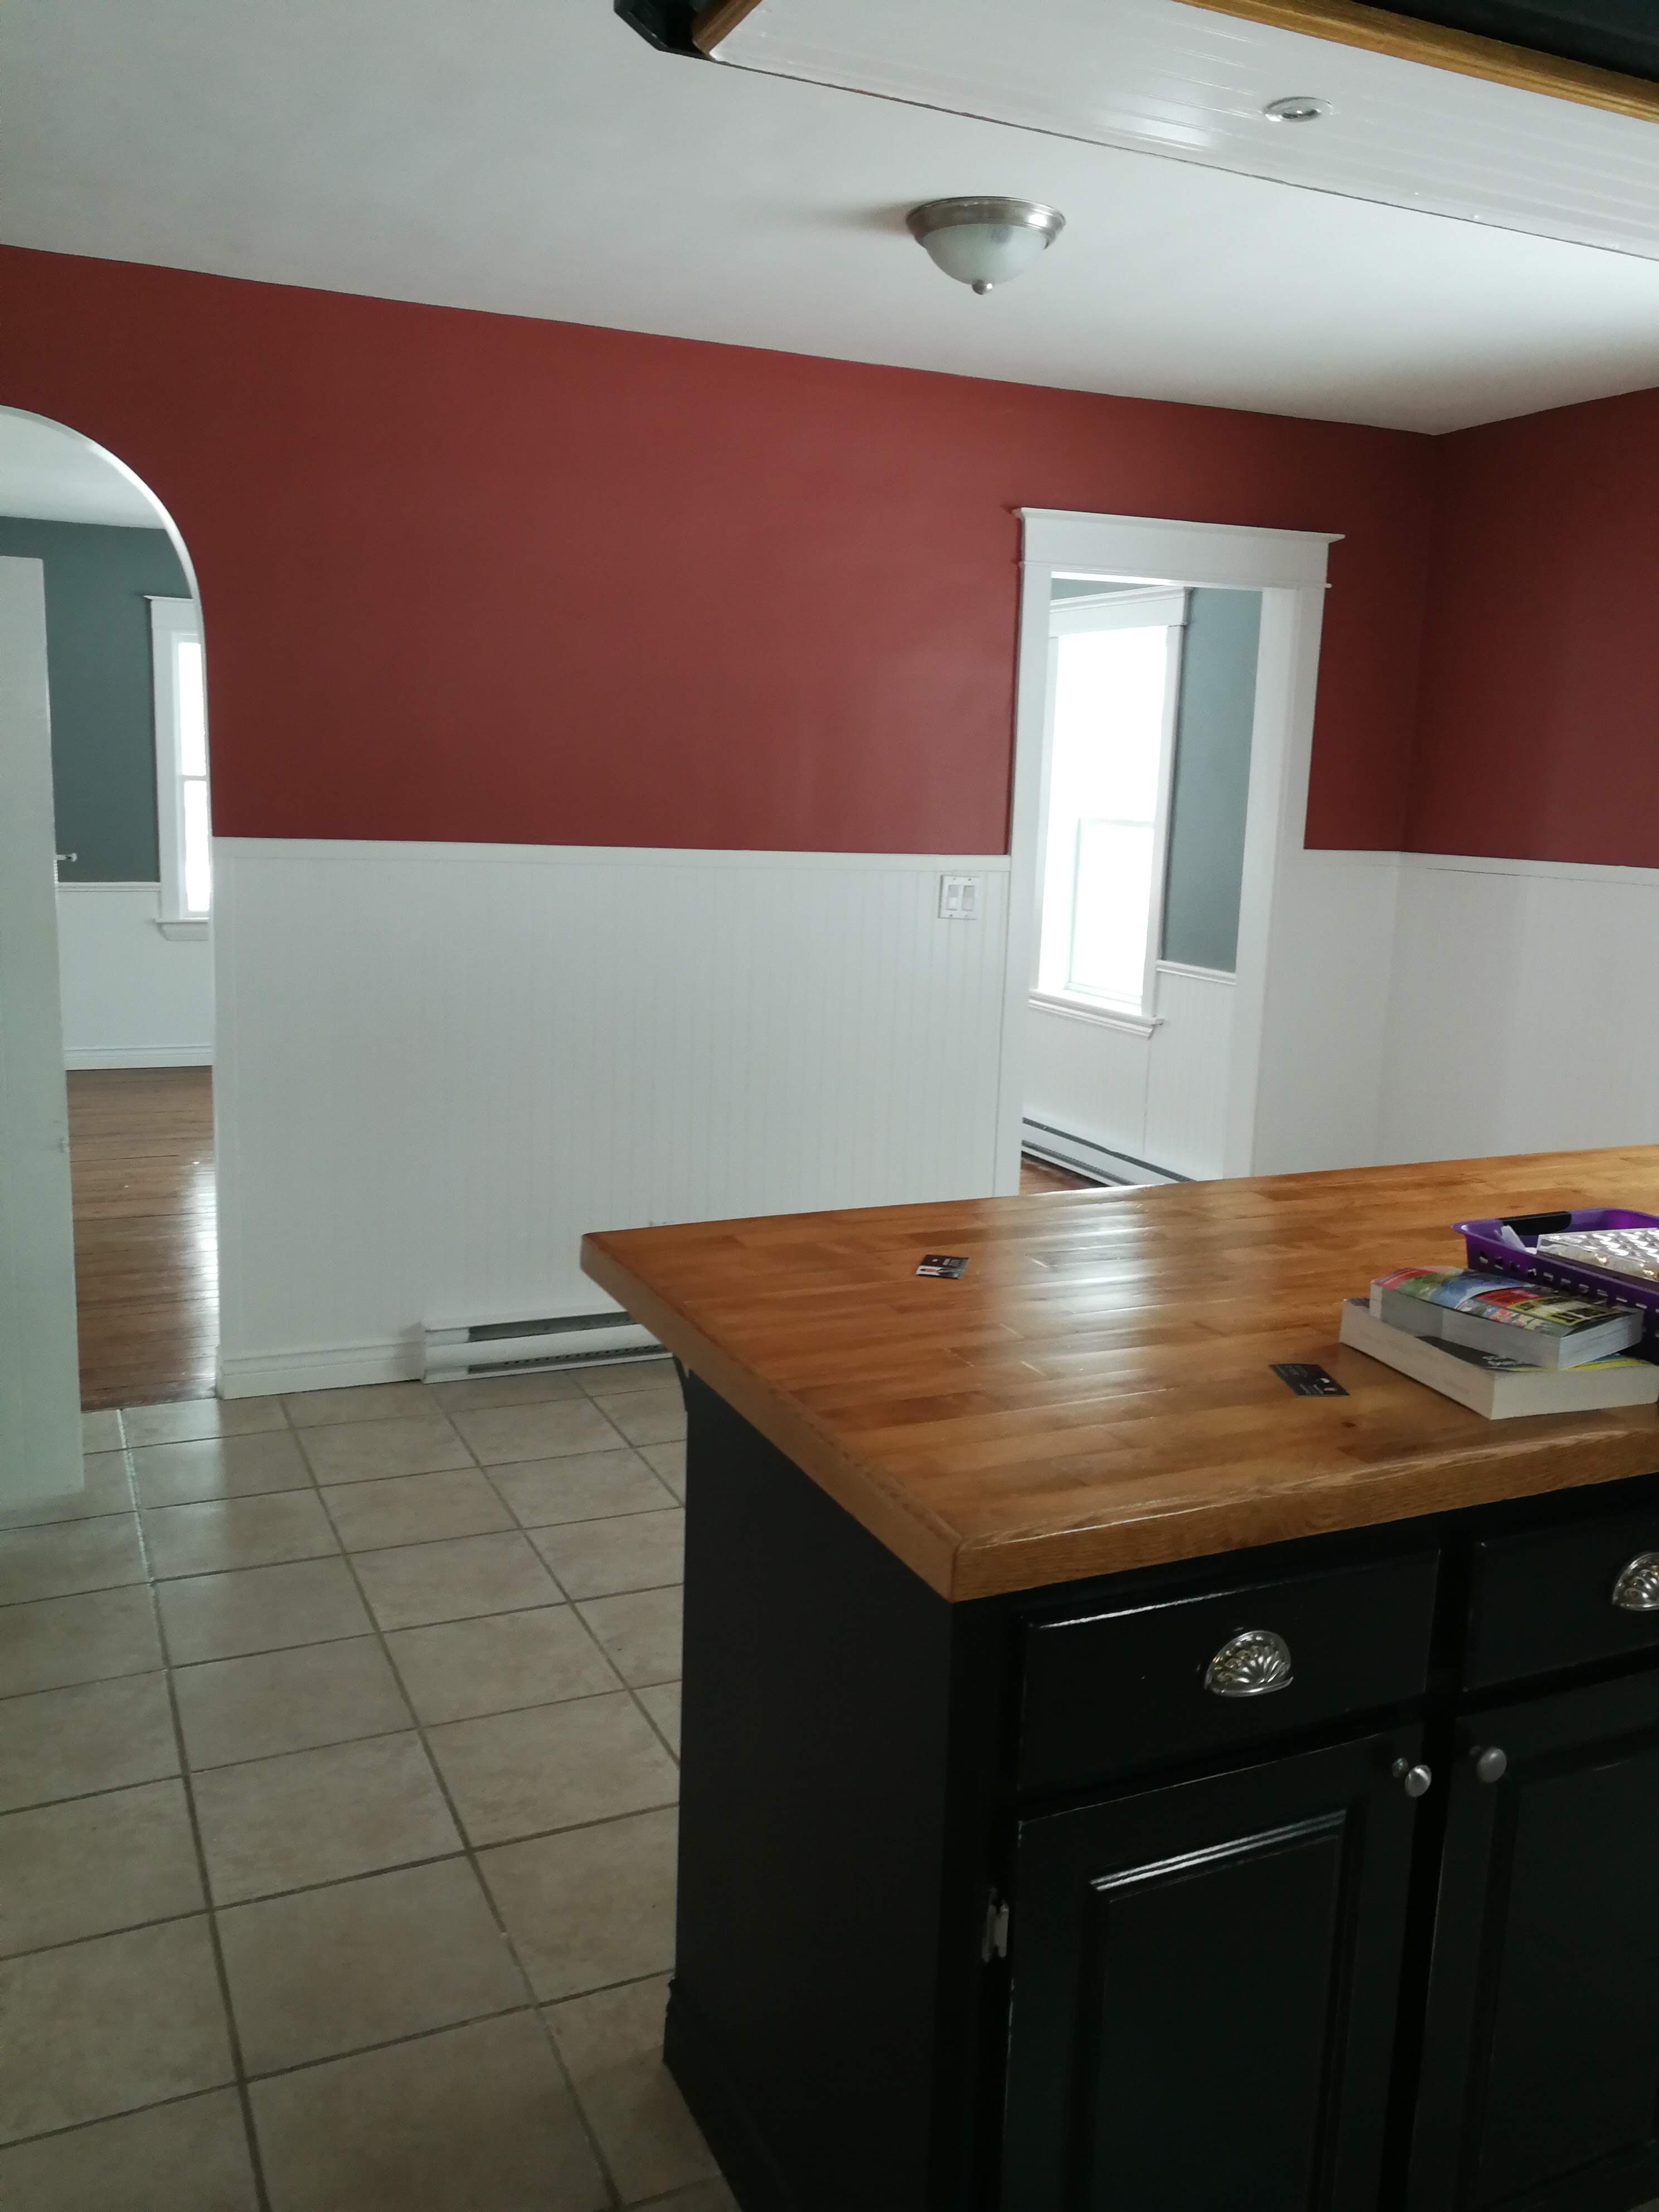
Before the house purchase closed, I was already planning how I would renovate the kitchen. The current kitchen wasn’t terrible. It just lacked storage, didn’t use the space well, and was kind of ugly. Before we had even taken ownership of the house, I was drawing floorplans and working out how we could make this space beautiful on a tight budget. With a plan in mind, I convinced Ryan that if we did all the work ourselves, we could turn the space into something beautiful. He agreed, and a couple of days before we moved in, he gutted the space for me. Just what I love – a blank slate!


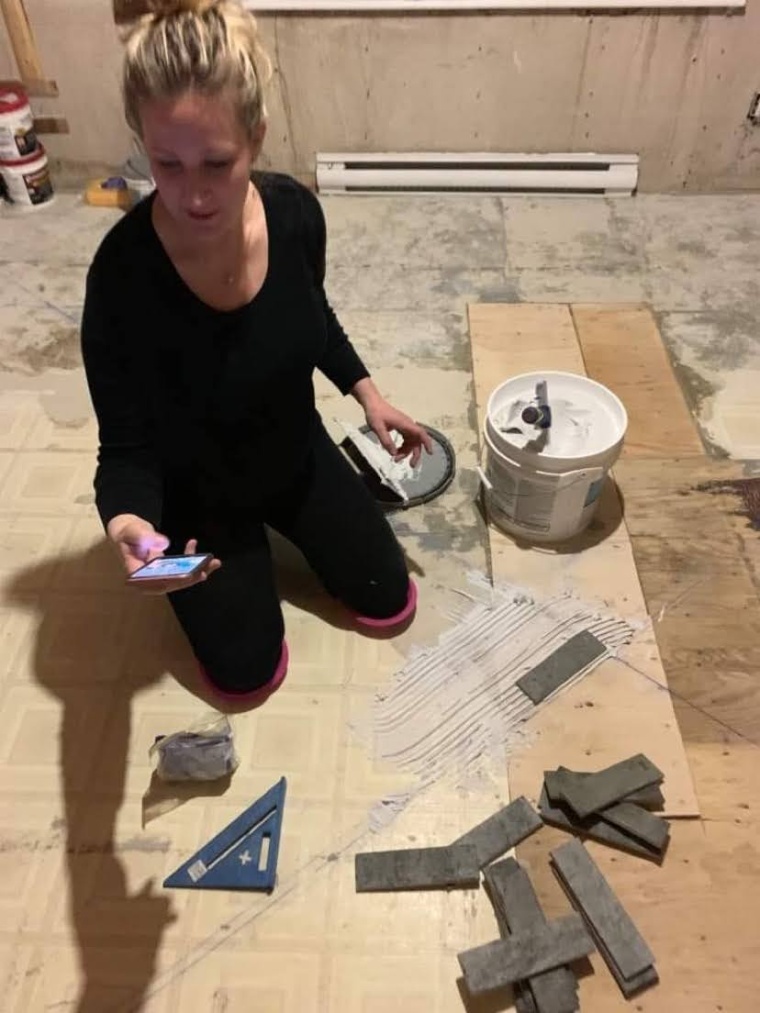
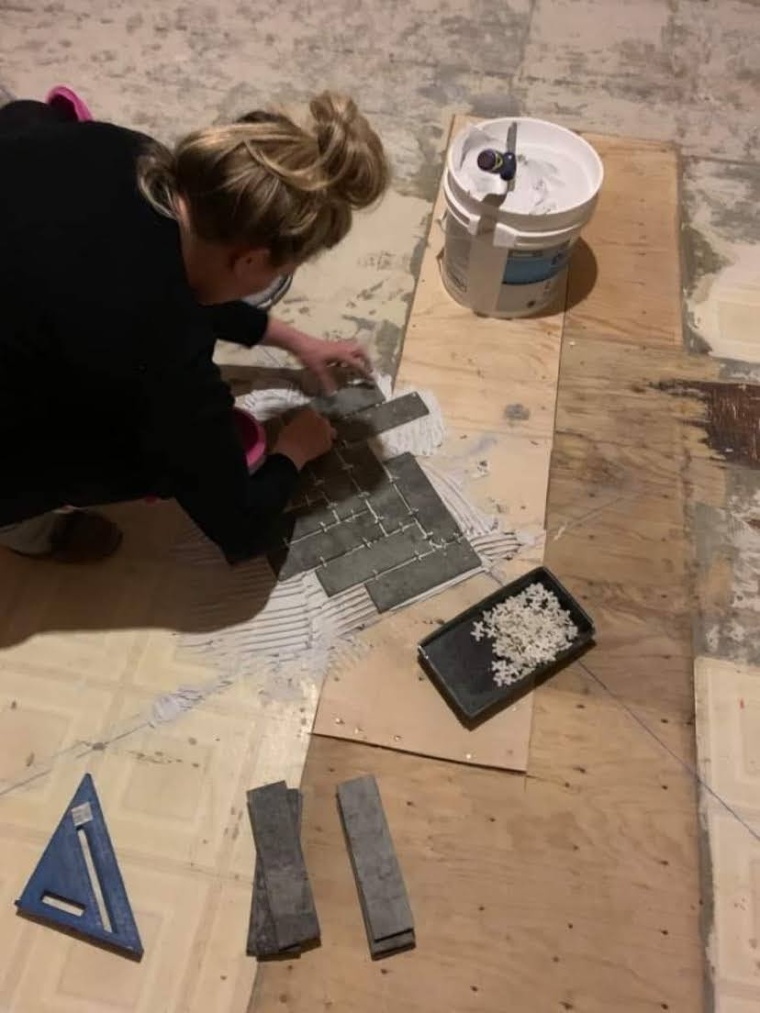
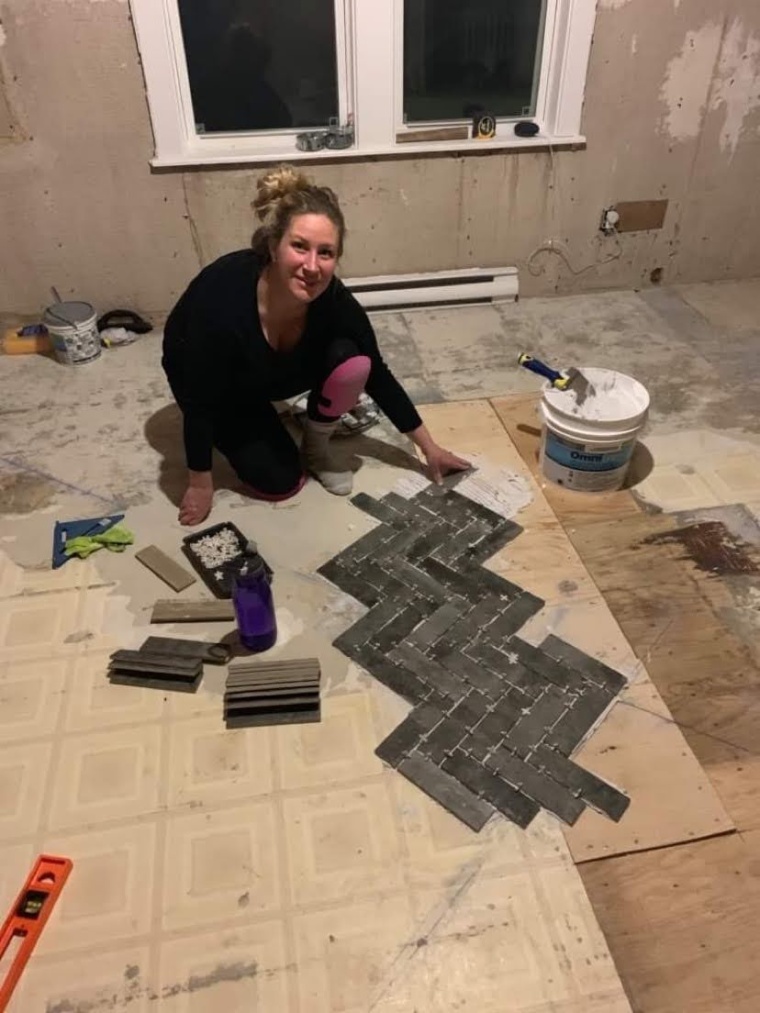
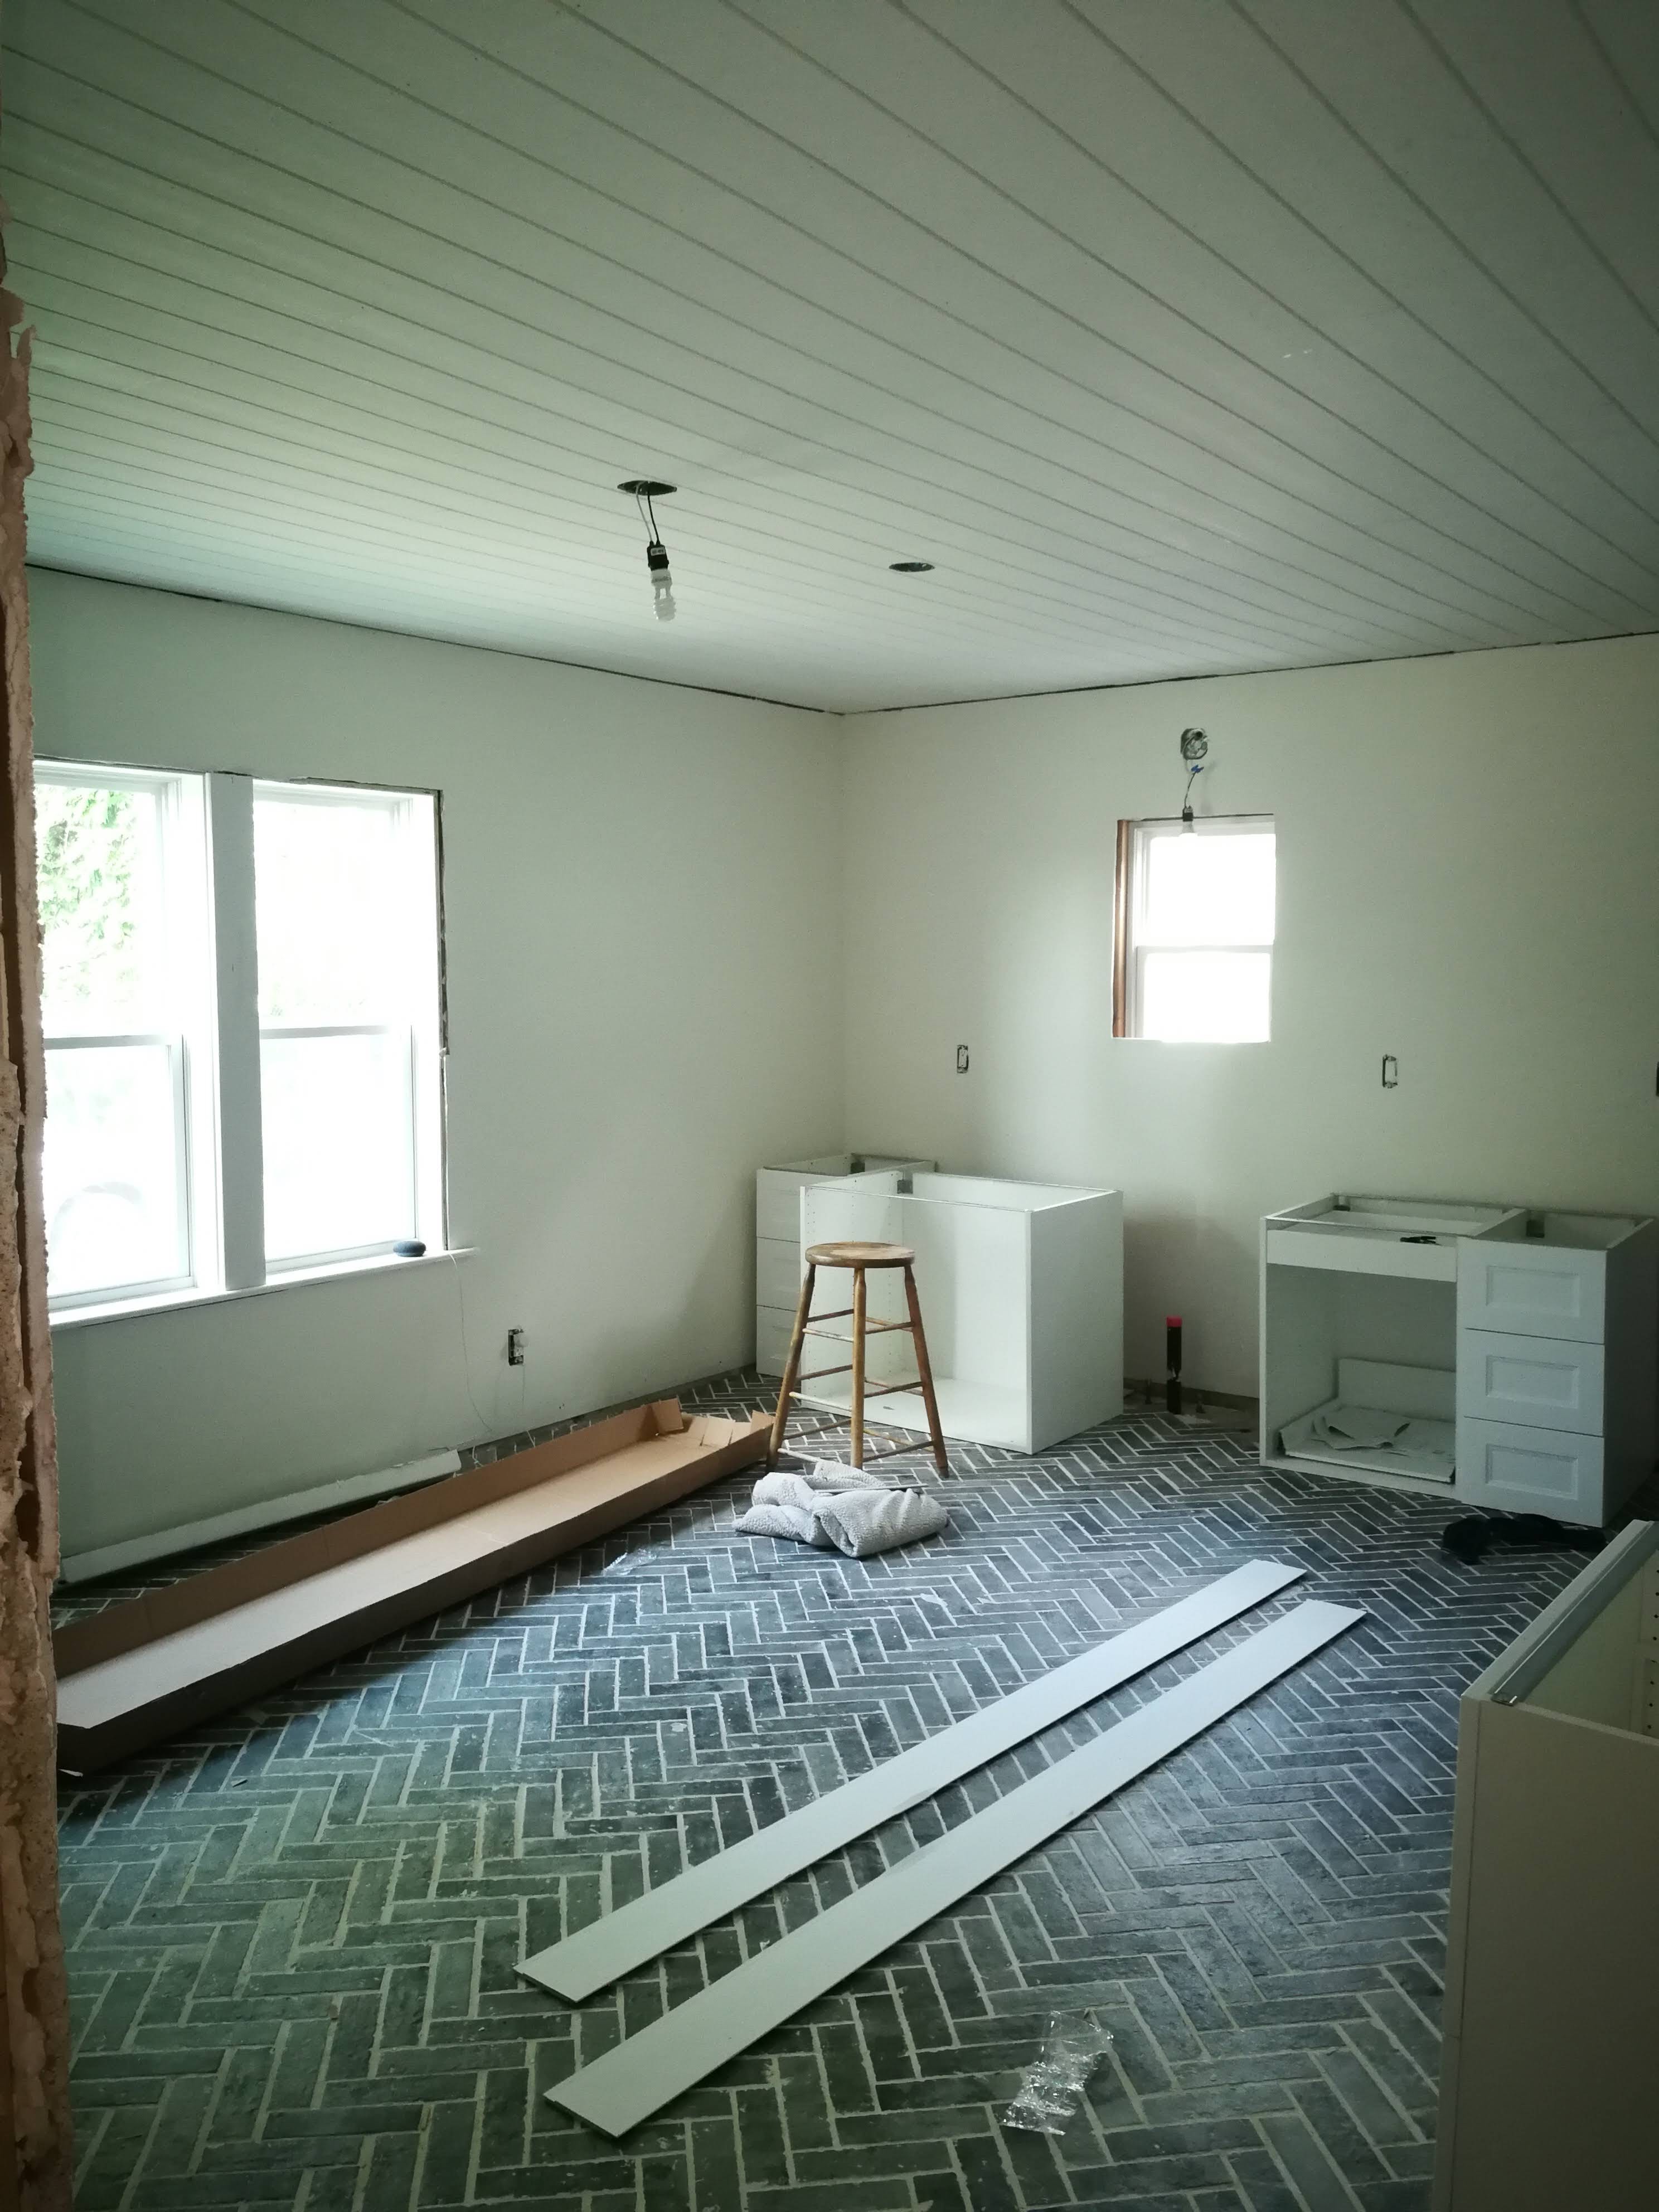
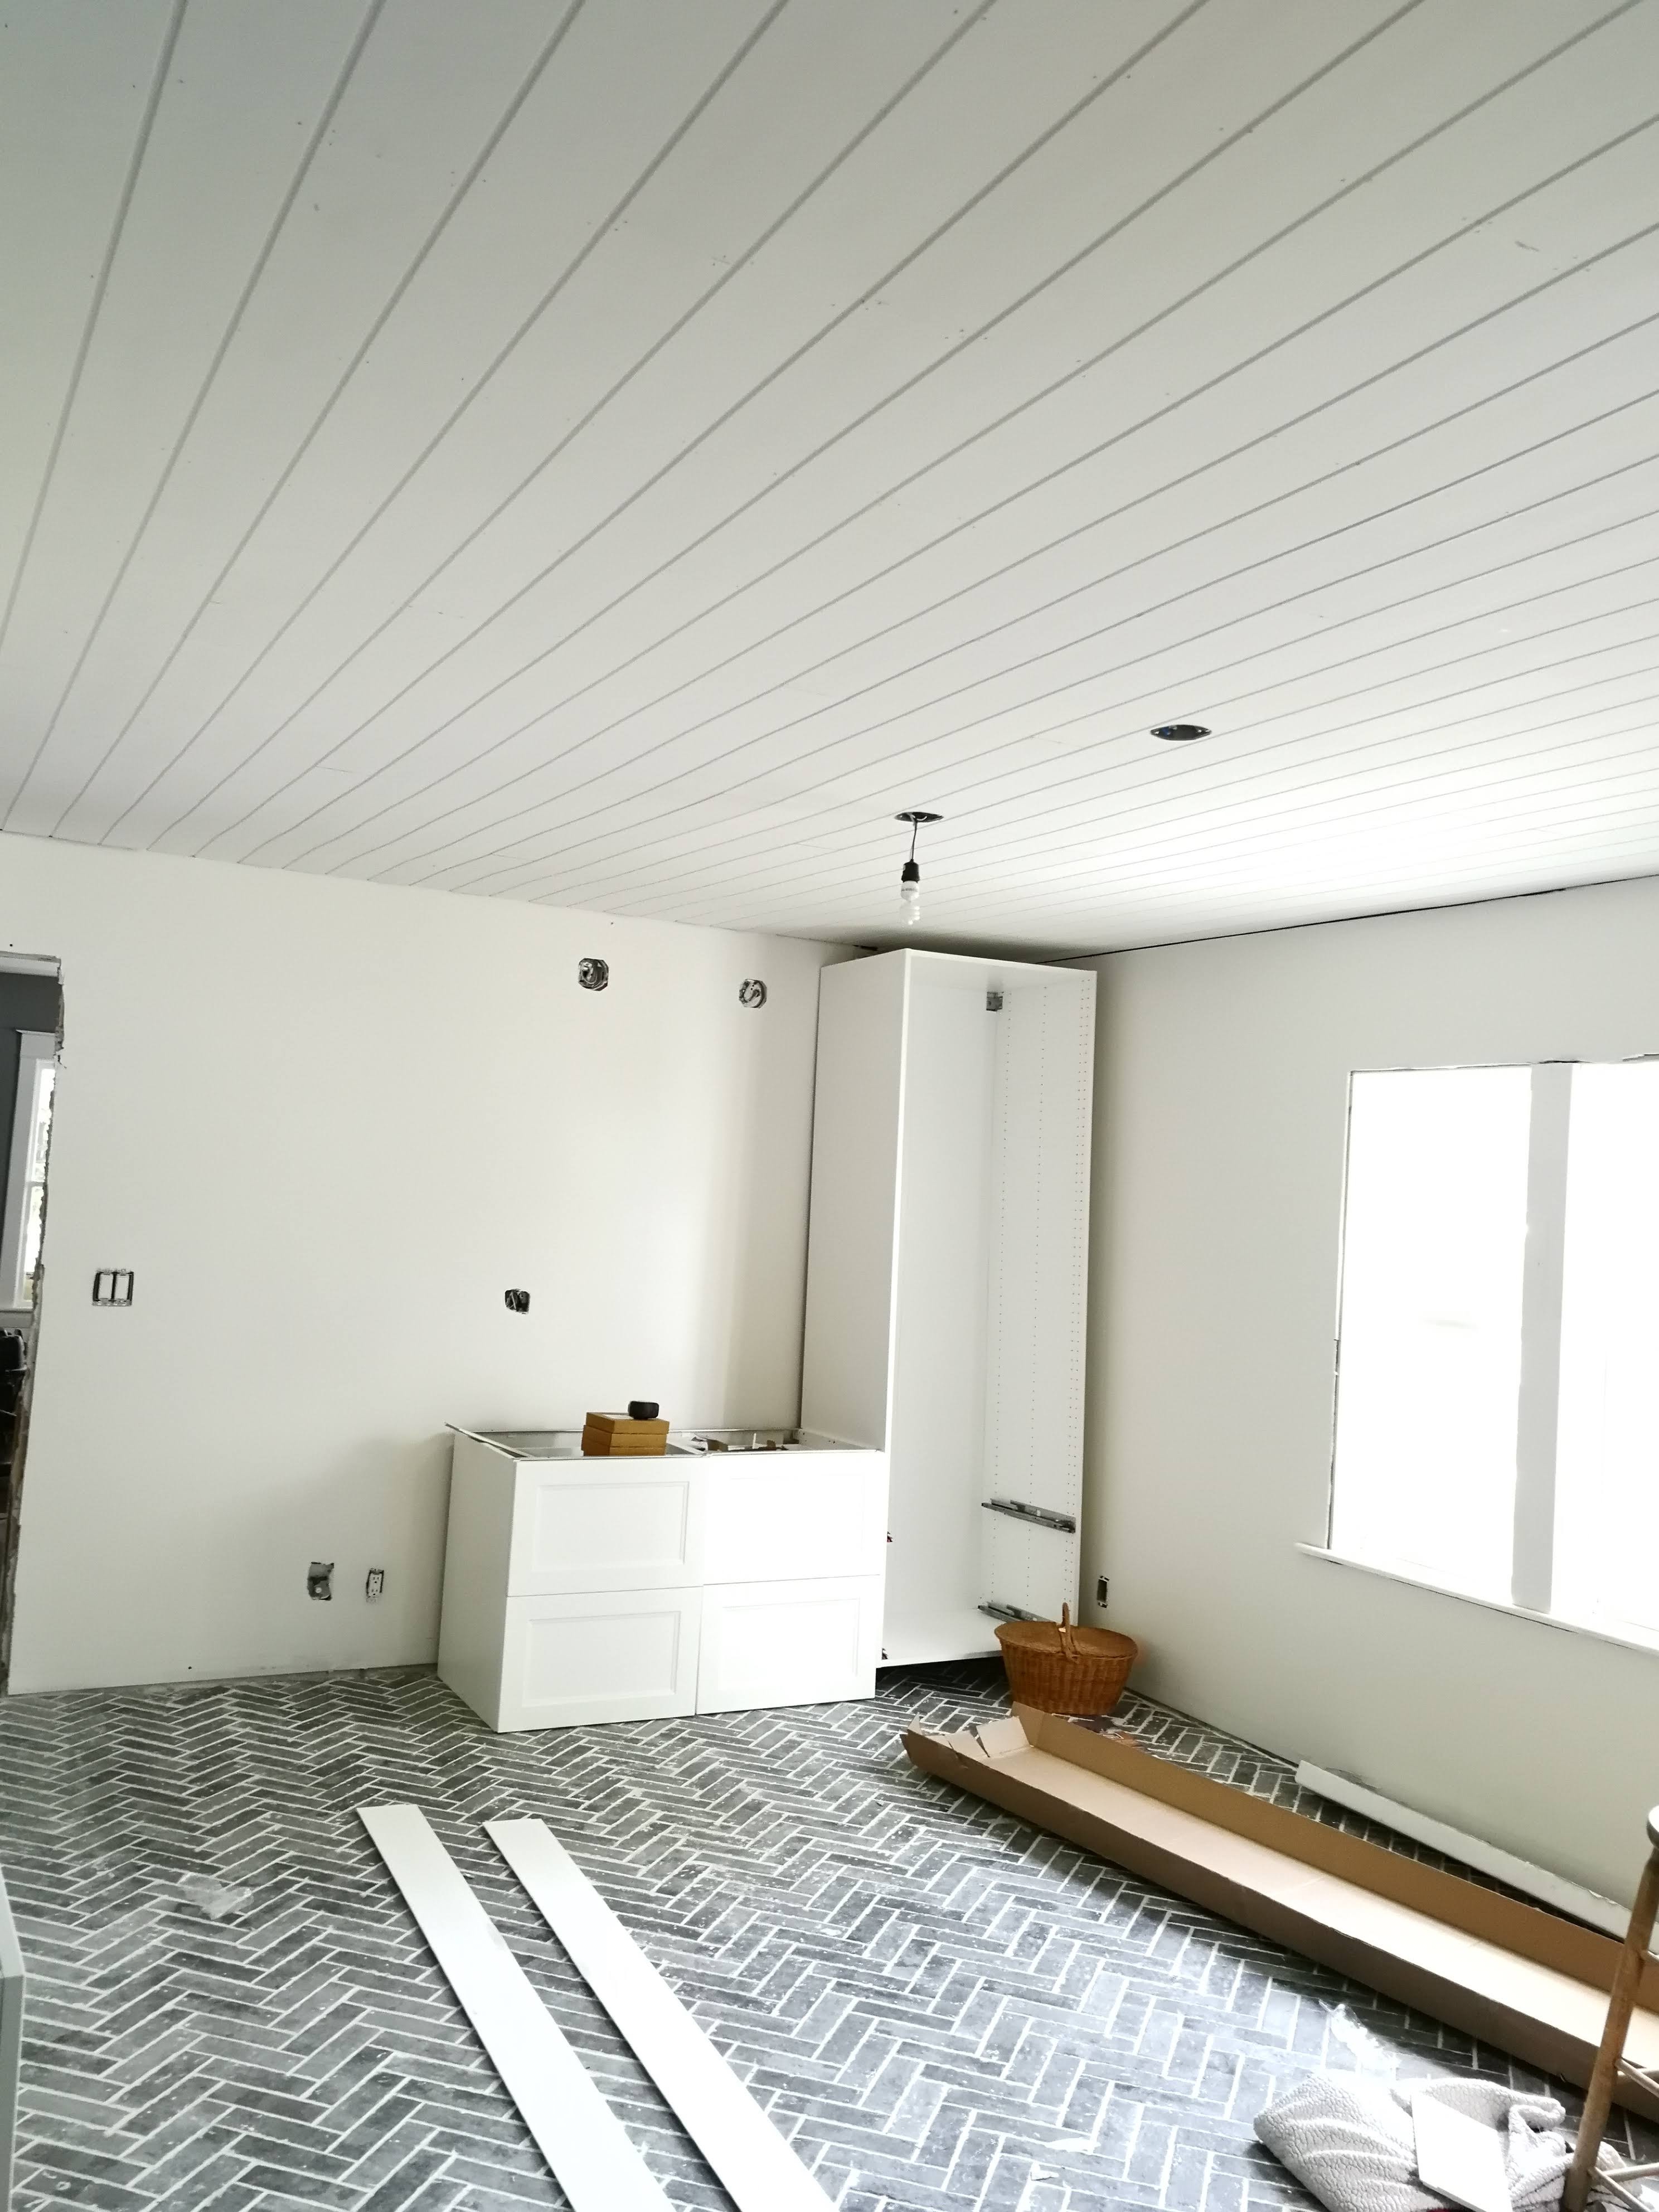
Once the kitchen cabinets, walls, and ceiling were gutted, I got to work planning out how I was going to lay my first floor. It was my first tiling job ever. Of course I chose to do a tricky herringbone pattern in small 3″ x 8″ individual tiles! If that wasn’t enough, the room is huge and the walls are definitely not square or straight in any way. The finished product is not perfect by any means. It is slightly crooked and I didn’t know to thoroughly clean the thinset and grout off the tile fully, so all the textured grooves are filled with white stuff. It took me a long time for the perfectionist in my to stop apologizing for the imperfections in the floor and appreciate it’s beauty. It adds the character of an old world kitchen I wanted to add and it hides dirt really well. I’d say that’s a win-win! Did I mention I tiled that giant floor six months pregnant? Well I did, and if that doesn’t make me proud of my determination to get it done, I don’t know what will!


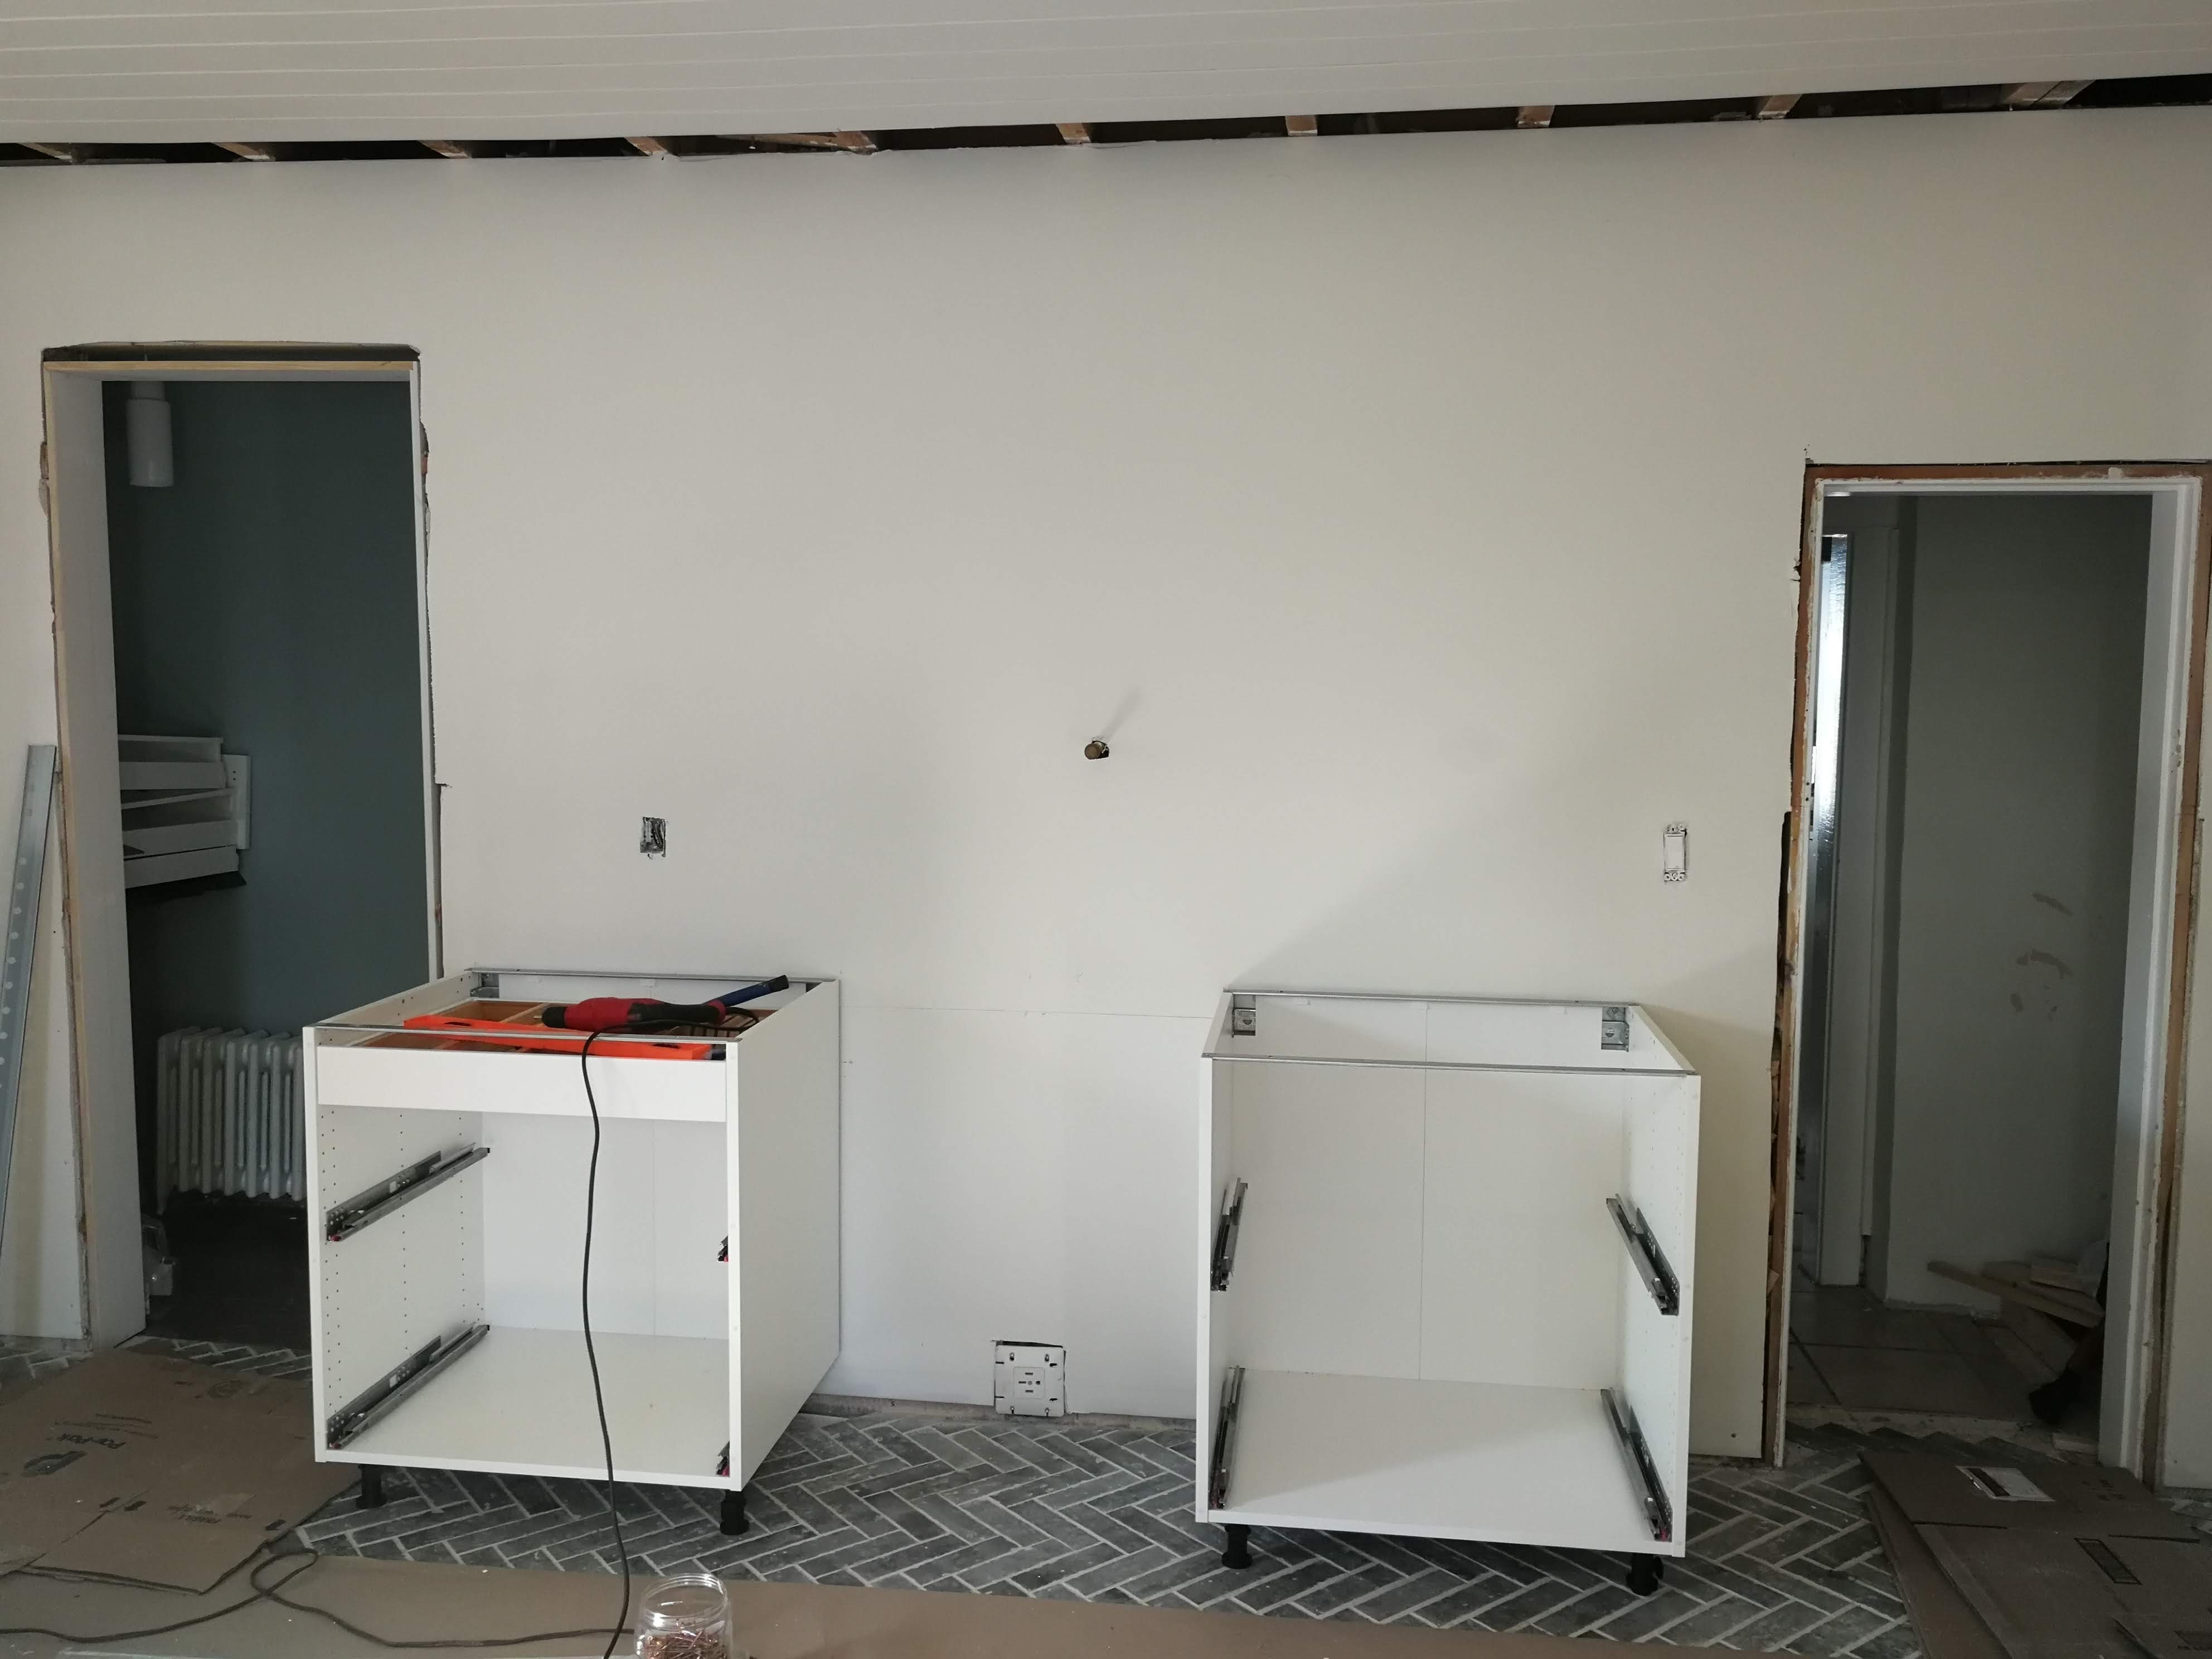
The Ikea cabinets we ordered from our nearest Ikea arrived shortly after the floor was complete. I quickly got to work assembling them and spent many hours watching videos of tips and tricks for installing an Ikea kitchen. If you are going to attempt this yourself, I highly recommend you look up Kody Horvey of UpToKode on YouTube. His videos are very helpful and when I got stuck, he even responded to my messages directly.


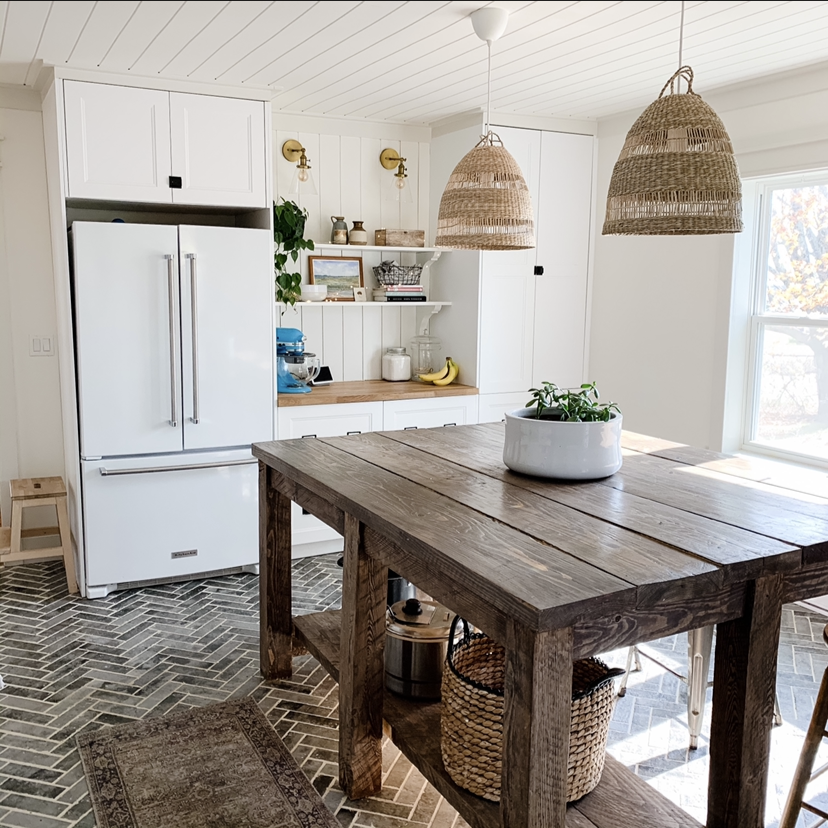
I had been designing my dream kitchen for years, and when I say years, I mean about fifteen years! I knew what I wanted. I have always loved a well-organized kitchen that divides the space up in zones. I didn’t have a bottomless budget, but I knew I could be smart about how I planned the space. The zones I incorporated were: clean-up zone, cooking zone, and baking zone. Because I am an avid baker, the baking zone was the most important to me. My goal was to add lots of storage in the kitchen without using too many heavy upper cabinets and still have a little bit of open shelving for display. I added shiplap behind the shelves in the baking nook and painted it all a moody dark green. I love that green but I always get restless, so I changed it up the next year.


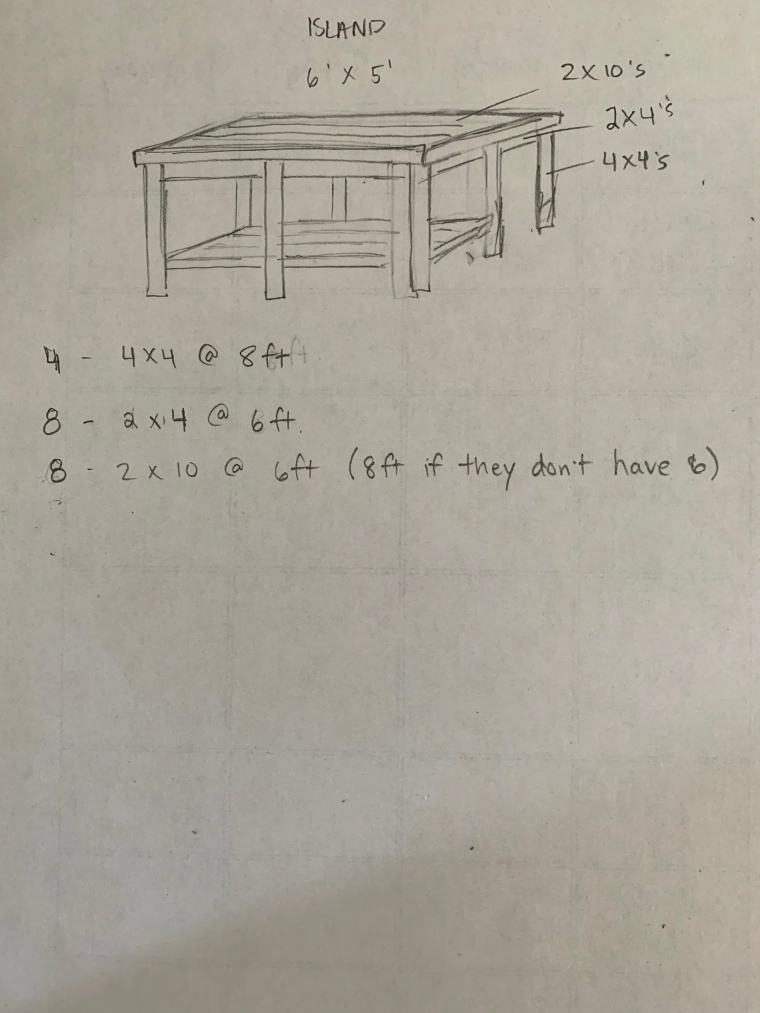
One of the big pieces I added to the kitchen to give it that rustic vibe, was the island. I had a couple of inspiration pictures in mind, so I drew out my plan and figured out what I needed to build the simple yet huge island. I wanted an open island that I could one day put a concrete countertop on with a shelf below and seating for six. Our neighbour drove me to the mill down the road from our house (during a snowstorm). Did I mention, Harvey has the best people?


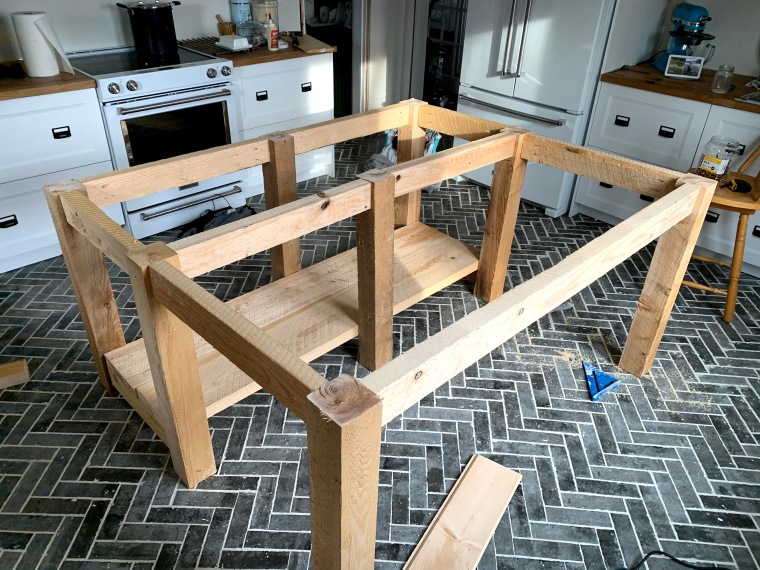
The hardest part of building this island was sanding the rough wood to prepare it for stain. I’d sand for an hour then clean for two hours. Eventually, I got it done, and our family enjoyed our first of many meals together at the island. I even got a couple of new tools out of this project!
The little things like trim, a peg shelf, and a vent hood would finish up this kitchen. I love how neutral it is, so I can change the accessories with the seasons and get a whole new look. When I first finished the kitchen, I didn’t like the stark black and white. They seemed to “modern farmhouse.” While I once loved that style, my tastes have since evolved a bit. I challenged myself to incorporate what I could to give the kitchen a more traditional look. I added the creamy peg shelf, switched out the black pendants for wicker ones, and plan to find just the right tile for my backsplash that will cover the wall from floor to ceiling. Stay tuned! This room will only get better and better.


